Introduction
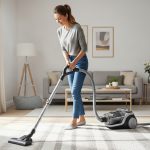
Robot vacuums have revolutionized the way we clean our homes, and one of the key components that ensure their efficiency is the Roomba brushes. These brushes play a vital role in capturing dirt, debris, and hair from various surfaces, but over time, they can become clogged and less effective. Regularly cleaning your Roomba brushes is essential to maintain optimal performance and prolong the lifespan of your robot vacuum. In this comprehensive guide, we will walk you through the step-by-step process of cleaning Roomba brushes, along with some valuable tips for maintaining them.
Tools and Materials Needed
Before diving into the cleaning process, gather the following tools and materials:
- Microfiber cloth
- Tweezers or scissors
- Compressed air canister or brush
- Mild dish soap or cleaning solution (optional)
- Water
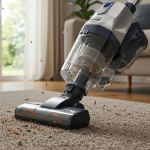
How to Clean Roomba Main Brushes
Several Roomba models are equipped with a main brush as a key component for efficient cleaning. Models such as the Roomba i3, i3+, i4, e5, e6, s9, s9+, and the Roomba j7+ are examples of models that come with a main brush.
The main brush, typically a bristle brush or dual rubber brush, is designed to agitate and lift dirt, dust, and debris from various floor surfaces. To maintain optimal cleaning performance, it is important to clean the main brush regularly.
Steps to Clean Roomba Brushes
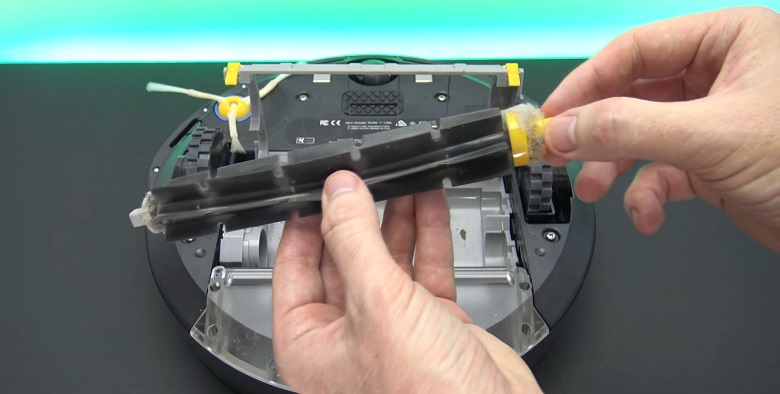
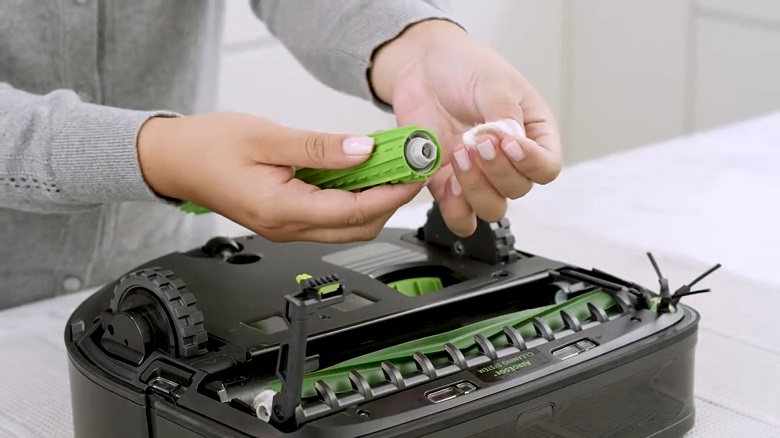
Step 1: Removing the Brushes from the Roomba

To start, ensure your Roomba is turned off and remove the dust bin. Locate the brush compartment and unlock the brush guard. Depending on the Roomba model, you may need to press a release button or twist the guard counterclockwise. Once unlocked, carefully lift the brush cage to expose the brushes.
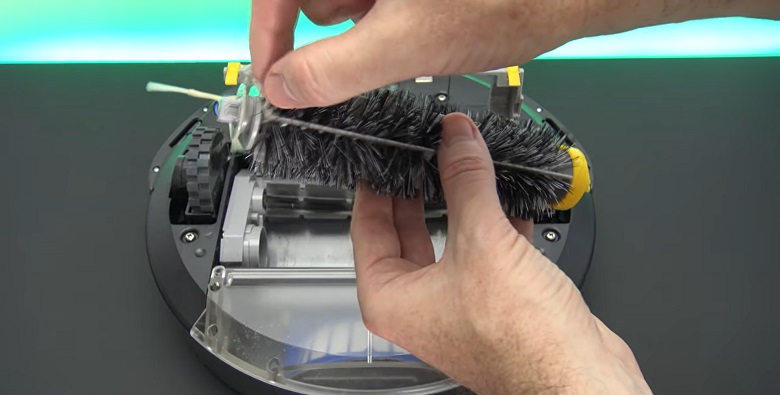
Step 2: Removing Hair and Debris from the Brushes
Using your fingers, gently pull out any hair or debris entangled in the bristles of the brush roller. If there are stubborn tangles, you can use tweezers or scissors to carefully cut and remove them. Be cautious not to damage the brush bristles or yourself during this process. Place the removed hair and debris into a trash bin.
Step 3: Cleaning the Brush Bearings
The brush bearings are the small, circular caps on each end of the brush roller. To clean them, dampen a microfiber cloth with water or a mild cleaning solution. Gently wipe the bearings to remove any dirt or grime buildup. Ensure they are completely dry before reassembling the brushes.
Step 4: Cleaning the Brush Caps
Next, clean the brush caps, which are located at the ends of the brush roller. Remove them by twisting or sliding them off, depending on your Roomba model. Once removed, rinse the caps with water and use a cloth to wipe away any debris or residue. Allow them to air dry completely before reattaching them to the brush roller.
Step 5: Reassembling the Brushes
After the brush caps are dry, reattach them to the brush roller by sliding or twisting them back into place. Align the brush roller with the brush compartment and carefully insert it, ensuring it sits securely. Lock the brush guard by twisting it clockwise or using the designated locking mechanism. Finally, reinsert the dust bin and you’re ready to clean again with freshly cleaned Roomba brushes.
How to Clean Roomba Brush Roller

Some Roomba models come equipped with brush rollers, which are essential components for effective cleaning performance. Models such as the Roomba 675, 690 from the 600 series, Roomba 890, 960, 980 from the 800 and 900 series, and Roomba i7, i7+ from the Roomba i series feature brush rollers.
These cylindrical brushes, adorned with bristles, play a pivotal role in agitating and lifting dirt, debris, and pet hair from different types of floor surfaces. Regularly cleaning the brush rollers is crucial to maintaining optimal performance.
To clean the brush roller of your Roomba, you can follow these steps:
- Turn off your Roomba and remove it from the charging base.
- Flip your Roomba upside down so that the brush roller is facing upwards.
- Locate the brush roller on the underside of your Roomba. It is usually a cylindrical brush with bristles.
- Depending on the Roomba model, you may need to remove a retaining bar or release tabs to take out the brush roller. Here is how you can access the brush rollers on different models:
- Roomba 600 Series (Roomba 675, 690): Locate the yellow tabs on both sides of the brush roller. Squeeze and pull the yellow tabs simultaneously to release the brush roller.
- Roomba 800 and 900 Series (Roomba 890, 960, 980): Locate the two yellow tabs on the brush guard near the brush roller. Slide the yellow tabs outward simultaneously to release the brush guard. Lift the brush guard to access the brush roller.
- Roomba i Series (Roomba i7, i7+): Locate the two yellow tabs on the brush roller module. Slide the yellow tabs outward simultaneously to release the brush roller module. Lift the module to access the brush roller.
- Once the brush roller is removed, use a pair of scissors or a seam ripper to cut or pull away any hair, threads, or debris that have accumulated around the bristles. You may need to rotate the brush roller manually to access all areas.
- Use your fingers or a cleaning tool to remove any stubborn debris stuck in the brush roller.
- Rinse the brush roller under running water to remove any remaining dirt or residue. Make sure to thoroughly clean the bristles.
- Gently shake or tap the brush roller to remove excess water.
- Allow the brush roller to dry completely before reinserting it back into your Roomba. This usually takes a few hours.
- Once the brush roller is dry, reattach it to the Roomba. Make sure it is securely in place.
Regularly cleaning the brush roller of your Roomba helps maintain its performance and prevents debris from clogging the mechanism. It is recommended to clean the brush roller every 1-2 weeks, or more frequently if you have pets or heavy dirt accumulation.
Tips for Maintaining Roomba Brushes
To keep your Roomba brushes in top condition and maximize their lifespan, follow these additional tips:
- Cleaning Brushes After Every Use: Make it a habit to remove hair and debris from the brushes after each cleaning session. This prevents the accumulation of dirt and maintains optimal performance.
- Checking Brushes for Damage Regularly: Regularly inspect the brush bristles for signs of wear or damage. If you notice frayed or bent bristles, it’s time to replace the brushes to ensure efficient cleaning.
- Replacing Brushes as Needed: Over time, even with regular cleaning, the brushes will wear out. Refer to your Roomba’s user manual or contact the manufacturer to find the appropriate replacement brushes for your specific model.
FAQS
Why does my Roomba keeps saying clean brushes?
Your Roomba is likely saying “clean brushes” because its sensors have detected a buildup of debris, such as hair or dust, in the brush compartment. This buildup can hinder the robot’s performance and may lead to tangled brushes.
By regularly cleaning the brushes, you can ensure optimal suction and efficient cleaning.
How often should you change Roomba brushes?
You should change Roomba brushes every 6-12 months, but this can vary based on usage and the amount of debris they encounter. Regular cleaning and maintenance will extend their lifespan.
Conclusion
Keeping your Roomba brushes clean is vital for maintaining the performance and longevity of your robot vacuum. By following the step-by-step instructions provided in this guide, you can easily clean your Roomba brushes and ensure that your robot vacuum operates at its best. Remember to gather the necessary tools and materials before starting, and always handle the brushes with care to avoid any damage.
Regularly cleaning your Roomba brushes is essential, as it helps prevent clogs, maintains optimal suction power, and ensures efficient cleaning on various surfaces.